A great dish for sous vide beginners.
SOUS VIDE PORK TENDERLOIN WITH ROSEMARY AND MAPLE SYRUP RECIPE
NOTE: This recipe is just for the tenderloin—does not include sauce or sides.
Equipment needed: Sous vide machine, water bath (big pot of water is fine), large ziplock bag, and a heavy skillet.
SERVINGS: 4
WHAT YOU NEED
1 whole pork tenderloin, about 1 pound
1 tablespoon chopped fresh rosemary, plus one spring
2 garlic cloves, peeled and smashed (no need to mince)
3 tablespoons maple syrup (I just put a few unmeasured glugs into the ziploc bag)
~1 teaspoon kosher salt
~1 teaspoon freshly ground pepper
1 tablespoon of oil (ideally canola or grapeseed, but olive oil will do)
HOW TO MAKE IT
Make the seasoning liquid. Combine chopped rosemary, garlic cloves, maple syrup, ground pepper, and salt in a small bowl.
Marinate the pork. Put the pork tenderloin in a large ziplock bag, and pour in the rosemary-syrup seasoning liquid. Massage the liquid into the tenderloin to make sure it’s fully seasoned. If you have the time, it’s best to pop this into the fridge for up to 24 hours to marinate. If you can’t, no biggie.
Set up your sous vide water bath, and cook! Set the machine to 136ºF for a perfect pinky medium-rare. Place the ziplock bag into the water, making sure the tenderloin is fully submerged (you can weigh it down with a metal spatula or something if you need to). Use a binder clip to clip the bag to the side of the pot to prevent water getting into the bag itself. Cook for at least 1 hour, and up to 4 hours.
Dry the cooked pork. Remove your ziplock from the water bath, and take out the pork. Pat it dry with paper towels. It’s important to get the outside thoroughly dry, so it sears quickly.
Quickly sear the pork. Heat a tablespoon of oil over high heat in a heavy skillet. Once the oil is extremely hot, add the pork and cook, turning occasionally until it’s well-browned on most sides (somewhere between 3-5 minutes total; remember, the meat is already fully cooked!).
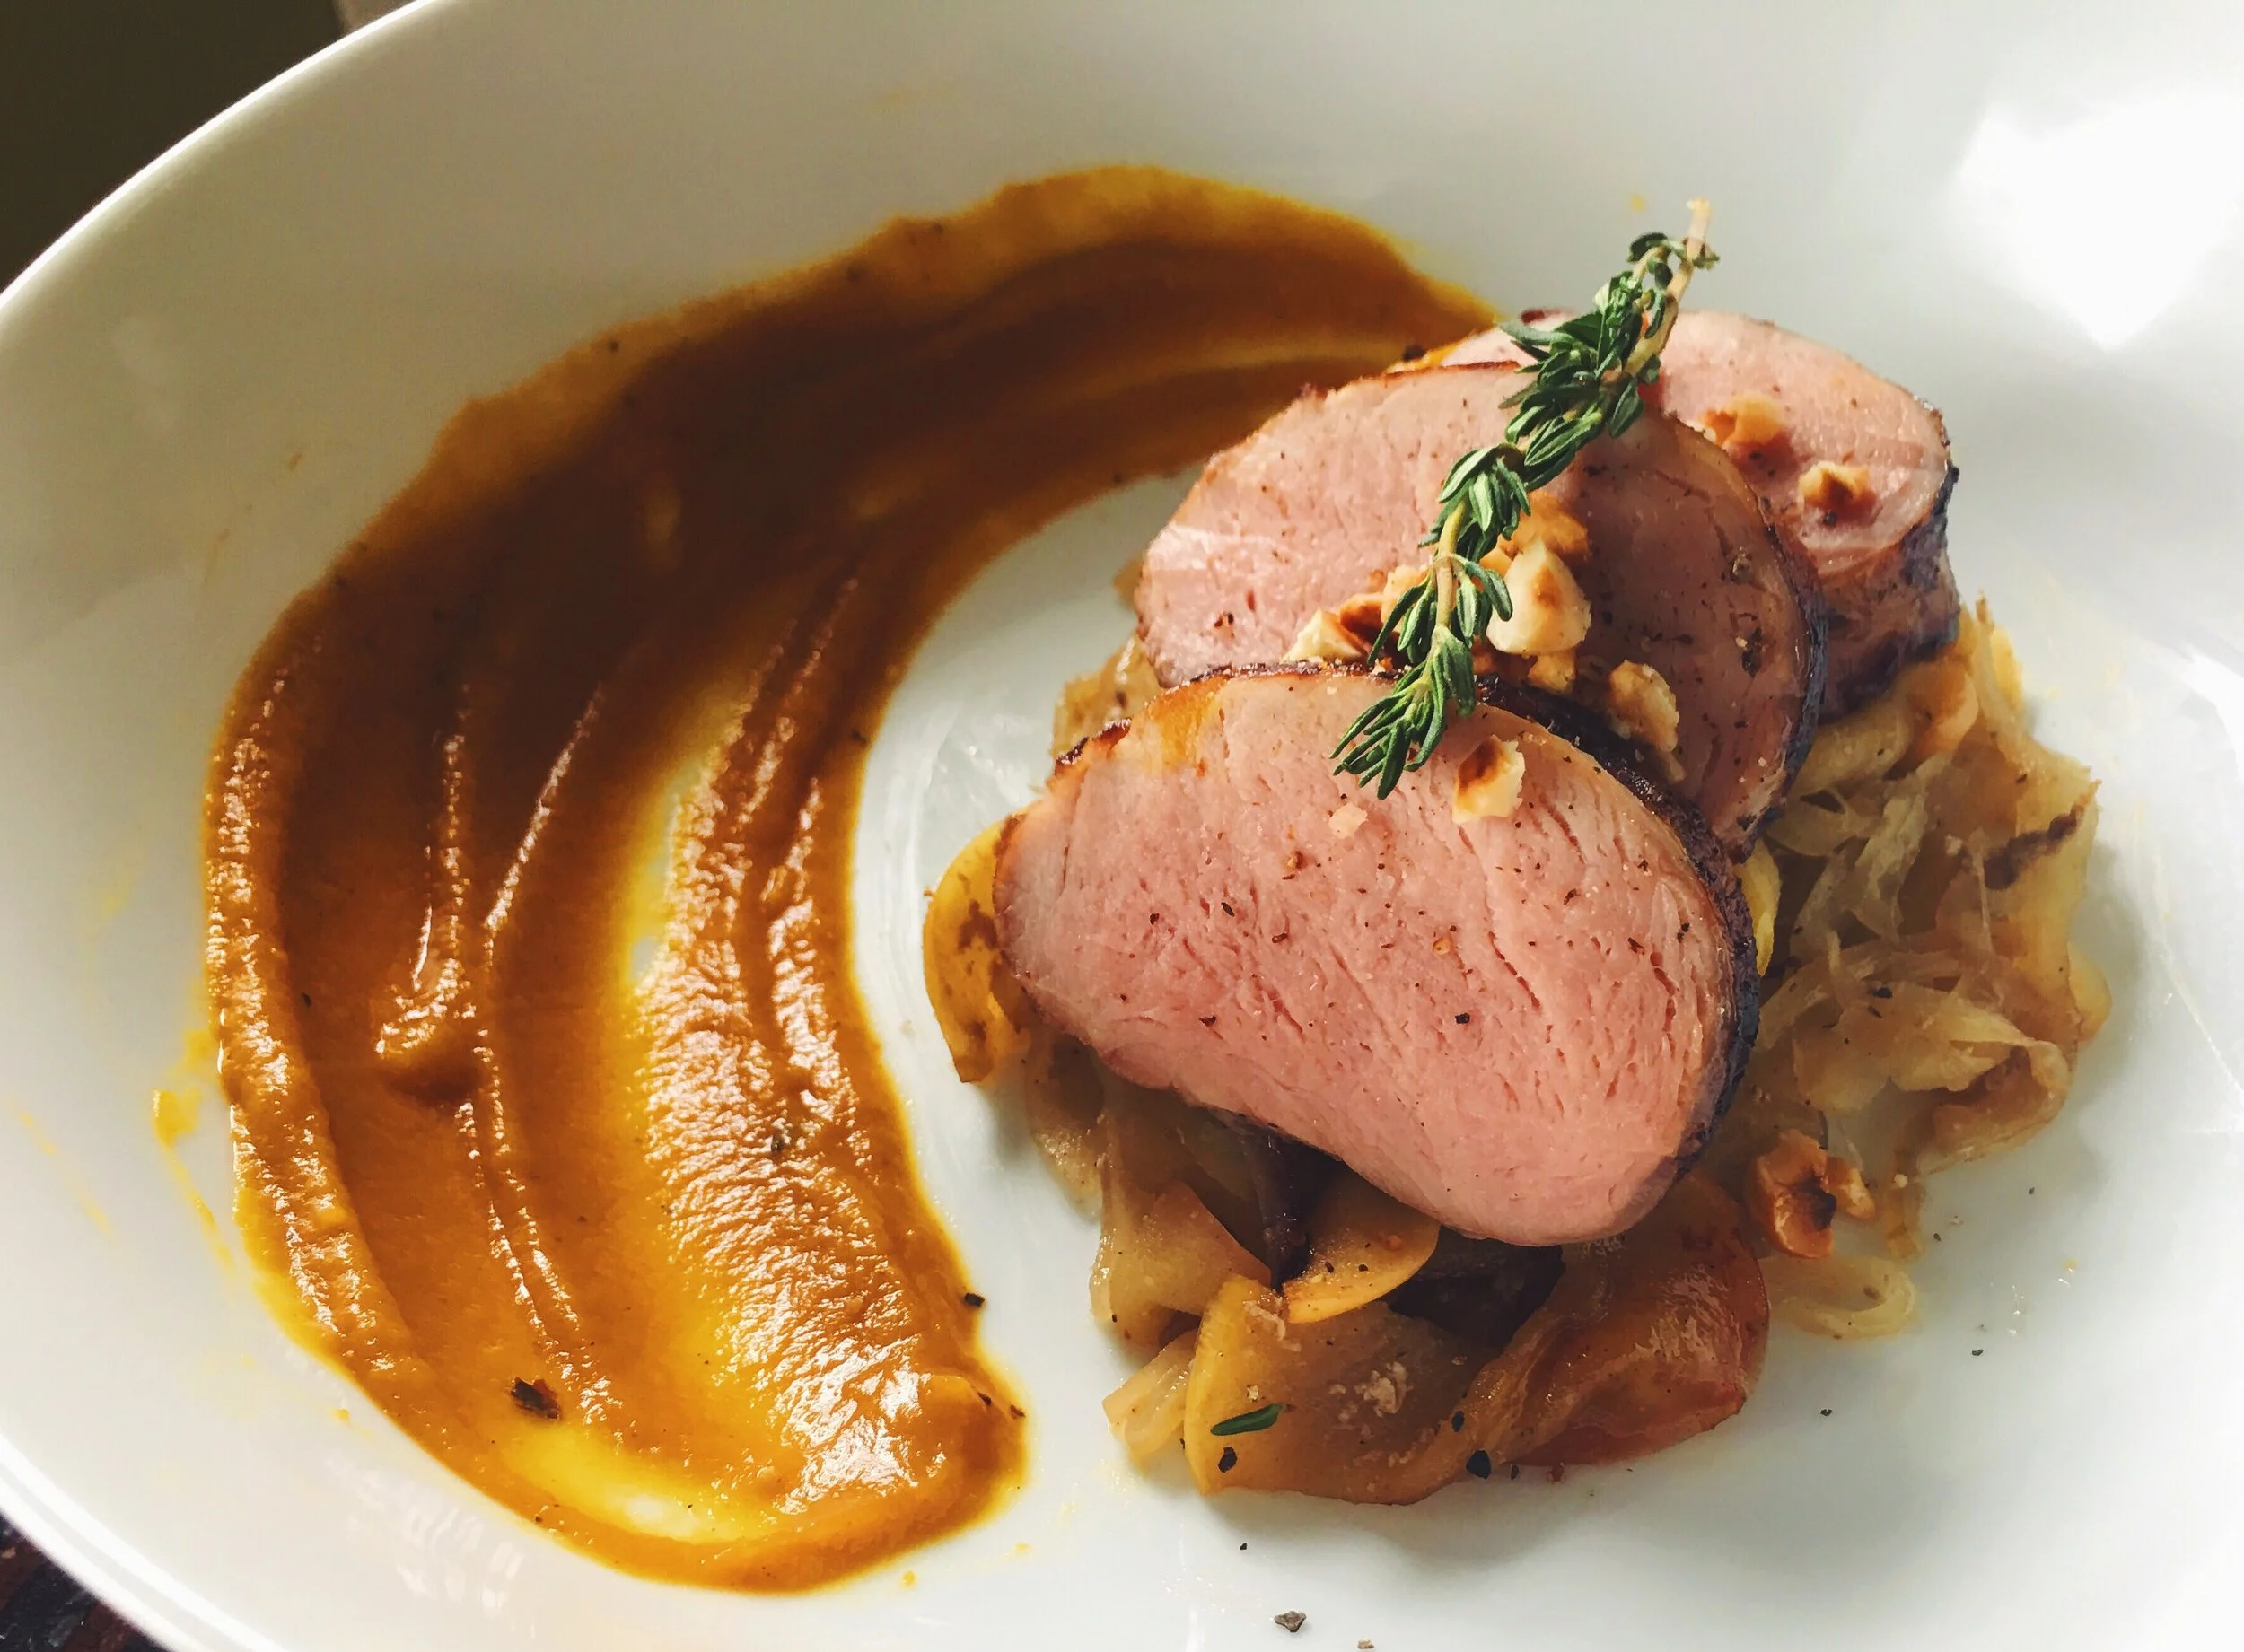
Serve immediately—no need to rest the pork when you sous vide. I like to cut it into thick medallions, and pour sauce over it (ideally a simple fruit + wine sauce, like cherry and red wine; I’ll post a recipe for that later). Serve with a side of polenta, grains, risotto, whatever.


![[Photo 1: Cut cauliflower head into big slices, about 1-inch thick.]](https://images.squarespace-cdn.com/content/v1/56246e9ce4b021dd852ac5e5/1508094607480-RQG6JS85BYX1YZGWFK42/1F615E45-20D8-40B9-BBA1-EE312D0B1E2D.jpg)
![[Photo 2: Trim the florets off of the cores.]](https://images.squarespace-cdn.com/content/v1/56246e9ce4b021dd852ac5e5/1508094791051-6POOMPAGHBLRG4D4L13N/4F7A65EA-9564-4C1C-A842-E31D71A0BC96.jpg)
![[Photo 3: Once the cauliflower is thoroughly browned, shove the florets to the edges of the pan. Sauté the garlic, lemon zest, and red pepper right in the center until fragrant, about 30 seconds.]](https://images.squarespace-cdn.com/content/v1/56246e9ce4b021dd852ac5e5/1508094937555-AHSHXJOM6RBF8Z3MAZ1H/5DCC1953-0B9C-4062-A723-77F138A49E8A.jpg)


![[Beet hummus, garnished with mint leaves and poppy seeds.]](https://images.squarespace-cdn.com/content/v1/56246e9ce4b021dd852ac5e5/1500395347372-9A62SMW6FX0Y2EX8JNE0/image-asset.jpeg)

![[You only need stuff that's already in your pantry (unless you're a domestic degenerate) + buttermilk.]](https://images.squarespace-cdn.com/content/v1/56246e9ce4b021dd852ac5e5/1498391725393-MIEB0U745UGWKE7YOMBM/IMG_9927.JPG)
![[One bowl, one pan, and technically only one hand needed.]](https://images.squarespace-cdn.com/content/v1/56246e9ce4b021dd852ac5e5/1498391760259-HSBTQQ8QQCNG8WK3X40N/image-asset.png)
